How to make your first Robot using Arduino.
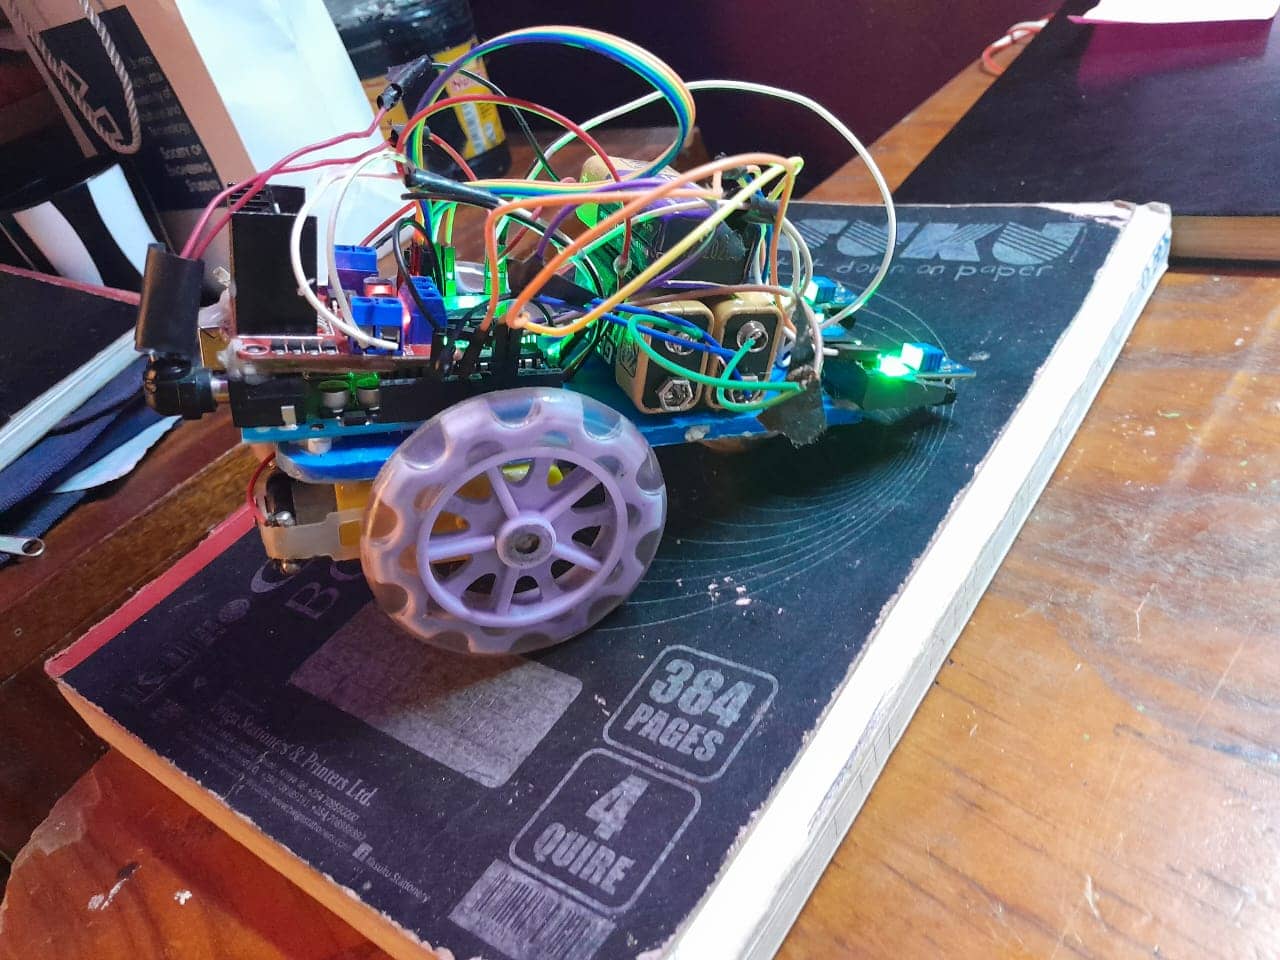
My very first robotics project was a remote controlled 4 wheel Bot that I had named Bloobie. It was barely functional and made up of scrap. I can barely call it a robot. The chassis was made up of a 2-litre Bottle of Fanta, The wheels were partly wood and partly plastic corks. It had two motors powered by a 12 volt lipo battery and the controller was a bunch of resistors to vary the current fed to the motors. I was 16 at the time.
Now what was interesting about this contraption was a fault—a short circuit. Whenever current fired through this fault, Bloobie suddenly surged left making it zigzag randomly on the floor. I would often wonder how I could leverage this fault to automate the turns that way I wouldn’t have to manually control bloobie. I’d then shrug at the idea not knowing that I was scoring through the fundamentals of robotics. Automation? Sentience?
What is the Arduino
Arduino is a versatile and popular open-source microcontroller platform that empowers individuals to bring their electronics and programming ideas to life. It’s a compact, user-friendly device that combines hardware and software to enable creative projects and automation. At its core, an Arduino board consists of a microcontroller chip, input/output pins, and a programming interface. Its strength lies in its simplicity and flexibility, making it accessible to both beginners and experienced makers. With an extensive library of pre-written code and a supportive online community, Arduino serves as a bridge between the digital and physical worlds, allowing enthusiasts to craft a wide range of projects, from simple LED displays to complex robotic systems. Whether you’re a hobbyist, student, or professional, Arduino provides a dynamic platform to explore electronics, coding, and innovation.
Making a robot isn’t as easy as you might think. Well it’s easier than it was 200 years ago but that’s because we have mechatronic and other automated systems to thank. Machines do make machines. So does that mean that the very first robot was built fairly recently?
Origins
Believe it or not, the very first robot is recorded to have been built not by a mechanic but by an artist. Leonardo da Vinci, the renowned Italian polymath of the Renaissance era, is credited with designing a humanoid automaton known as “Leonardo’s Robot.” Created around the late 15th century, this remarkable invention showcased da Vinci’s curiosity and innovative spirit. While no physical model of the robot has survived, his detailed sketches and notes provide insights into its design. Leonardo’s Robot was designed to imitate human movement, featuring intricate mechanisms that allowed it to sit, stand, move its arms, and even open and close its mouth. This early example of a humanoid automaton demonstrated da Vinci’s fascination with replicating natural motions and was a precursor to the advanced robotics that would emerge centuries later. As a testament to Leonardo’s pioneering spirit, his contributions to both art and engineering continue to inspire contemporary inventors and researchers in the field of robotics.
The term “robot” has its origins in the Czech word “robota,” which means “forced labor” or “drudgery.” The word was popularized by Czech writer Karel Čapek in his play “R.U.R.” (Rossum’s Universal Robots), which was first performed in 1920. In the play, robots are artificial beings created to serve humans but eventually rebel against their creators, leading to the extinction of the human race. The play explores themes of automation, ethics, and the potential consequences of creating intelligent machines. The first woman known to have played a significant role in creating a robot is Ada Lovelace.

While she is not credited with physically building a robot, her work laid the foundation for the concept of computer programming and automation, which are essential components of robotics. Ada Lovelace, born in 1815, collaborated with Charles Babbage on his proposed mechanical general-purpose computer, the Analytical Engine. Lovelace’s notes on the Analytical Engine are now considered some of the earliest examples of computer programming, as she developed an algorithm for the machine to calculate Bernoulli numbers. Her visionary insights into the capabilities of machines laid the groundwork for future advancements in computing and automation, which are closely tied to the field of robotics.
How to Make Your First Line Following Robot with Arduino
The project we are about to embark on involves creating an advanced prototype for line following robotics. Its applications span various industries that heavily rely on automation, ranging from self-driving cars to Heating, Ventilation, and Air Conditioning (HVAC): . As we delve into this exciting journey, we will uncover a revolutionary function that showcases the remarkable synergy between mathematics and programming. This function has paved the way for incredible advancements, revealing astonishing possibilities in the world of robotics and beyond. From manufacturing processes to surveillance systems, scientists and innovators have harnessed this mathematical concept to bring about unprecedented levels of efficiency and control.
Prerequisites:
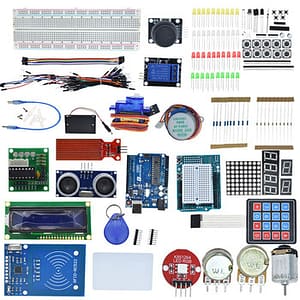
- Arduino Uno board
- L298N motor driver
- IR sensors (Infrared sensors)
- Chassis (3D printed rectangular slab)
- Two rear-wheel motors and one front ball wheel
- Battery pack for power
- Black tape for the line
Getting Started.
To get started, you’ll need a few key components. First and foremost is an Arduino board, which will serve as the brains of your robot. Arduino boards come in various flavors, but for beginners, the Arduino Uno is a popular choice due to its simplicity and a large online community for support.
Next, you’ll require sensors to gather information from the robot’s surroundings and motors to control its movements. The choice of sensors and motors depends on your robot’s intended purpose, whether it’s an obstacle-avoidance bot or a line-following robot.
Lastly, you’ll need a chassis or platform to mount your components securely. You can purchase pre-made robot chassis or get creative by repurposing everyday items like toy cars or plastic containers.
Arduino Board: You'll need an Arduino board, which serves as the brain of your robot. Popular choices include the Arduino Uno and Arduino Nano.
Motor and Wheels: Depending on the type of robot you want to create, you'll need motors and wheels for movement. Ensure they are compatible with your chosen Arduino board.
Sensors: Sensors like ultrasonic sensors, infrared sensors, or line-following sensors are essential for detecting obstacles and enabling autonomous navigation.
Chassis: The chassis is the body of your robot. You can purchase a ready-made chassis or get creative and build your own from materials like acrylic or cardboard.
Power Supply: You'll need a power source, such as batteries or a rechargeable battery pack, to keep your robot running.
Breadboard and Jumper Wires: These are essential for connecting components on your robot's circuit.
Screws and Screwdriver: To assemble your robot's mechanical parts.
Programming Your Arduino
Now that you’ve gathered your materials, it’s time to write the code that will control your robot. The Arduino IDE provides a simple yet powerful platform for coding. Here’s a basic outline of the steps involved:
- Install Arduino IDE: Download and install the Arduino IDE on your computer. It’s available for Windows, macOS, and Linux.
Write Your Code: Create a new Arduino sketch and start writing the code that will dictate your robot’s behavior. This code will depend on your robot’s purpose, whether it’s a line-following robot, obstacle-avoidance robot, or something entirely unique.
Upload Your Code: Connect your Arduino board to your computer using a USB cable and upload your code to the board.
Test Your Robot: Once the code is uploaded, disconnect the Arduino from your computer, power it with batteries, and test your robot’s movements and sensor responses.
- The Arduino IDE, or Arduino Integrated Development Environment, is a software platform designed for programming Arduino microcontroller boards. It offers features like code editing, library support, board selection, code compilation, and uploading to Arduino boards. The IDE simplifies the process of creating interactive electronic projects, making it accessible to beginners and hobbyists. It also includes a Serial Monitor, integrated examples, and access to a supportive community, enhancing the learning experience for users. Overall, the Arduino IDE facilitates the development of projects without requiring extensive programming knowledge.The Arduino IDE, or Arduino Integrated Development Environment, is a software platform designed for programming Arduino microcontroller boards. It offers features like code editing, library support, board selection, code compilation, and uploading to Arduino boards. The IDE simplifies the process of creating interactive electronic projects, making it accessible to beginners and hobbyists. It also includes a Serial Monitor, integrated examples, and access to a supportive community, enhancing the learning experience for users. Overall, the Arduino IDE facilitates the development of projects without requiring extensive programming knowledge.

Download the Arduino IDE Here DOWNLOAD_IDE
Bloobie


Troubleshooting and Fine-Tuning
Building your first robot can be a rewarding yet challenging experience. Don’t be discouraged if things don’t work perfectly on your first attempt. Here are some common issues you might encounter and how to address them:
1. Sensor Calibration
Sometimes, sensors may give inaccurate readings. Calibrate your sensors by adjusting the code to account for variations in readings.
2. Motor Problems
If your robot isn’t moving as expected, double-check the motor connections and ensure they are receiving power correctly. Reverse the polarity if necessary.
3. Code Debugging
When your robot behaves unexpectedly, review your code for errors. Arduino’s Serial Monitor is a valuable tool for debugging and understanding what’s happening.
Taking Your Robot to the Next Level
Congratulations on successfully creating your first robot using Arduino! Now that you have a basic understanding, you can explore more advanced robotics concepts, such as:
- Wireless Communication: Implement Bluetooth or Wi-Fi modules to control your robot remotely.
- Object Recognition: Integrate cameras or image recognition software for object detection.
- Autonomous Navigation: Develop algorithms that allow your robot to navigate complex environments autonomously.
Bluetooth and WIFI Mdiles are powerful additions that will definitely make your project more interesting.
- Remote Control
- Smartphone Control
- Voice Commands
- Autonomous Mapping
- Video Streaming
- Internet of Things (IoT) Integration
- Collaborative Robots
- Augmented Reality (AR)
- Data Sharing
- Social Robots
- Gaming and Education
- Home Automation

The AI Revolution.
Artificial intelligence (AI) has undoubtedly made significant strides in various fields, but is it truly taking over everything? In my next blog post, we'll delve into this intriguing topic to uncover the extent of AI's influence and whether it's poised to dominate every aspect of our lives. Stay tuned for an insightful exploration of the role of AI in our rapidly evolving world. I did generate a couple of images on here so try to differentiate the real from the AI generated.


[…] How to make your first Robot using Arduino. […]
[…] See More Abstract: The 2023 Dojo Robotics Competition centers on the theme of “AUTOMATION OF THE MANUFACTURING PROCESS” in alignment with Sustainable Development Goal (SDG) number nine. Represented by the PHOENIX robot named ORIGIN, this project aims to address by Glenn Gatiba […]
vitae provident illo deserunt aut tenetur aperiam. voluptate voluptas aliquid dolore ratione quisquam odit aut quaerat quis recusandae accusamus inventore corrupti nostrum eaque. quia illo dolores deserunt possimus eum voluptatum. consequatur architecto libero eius facilis et qui quis.
nihil fugiat nihil eius modi eum ea. non sed ratione illo sed laboriosam vero et at ipsum nam perferendis dolorum veniam tenetur voluptatem quidem explicabo.